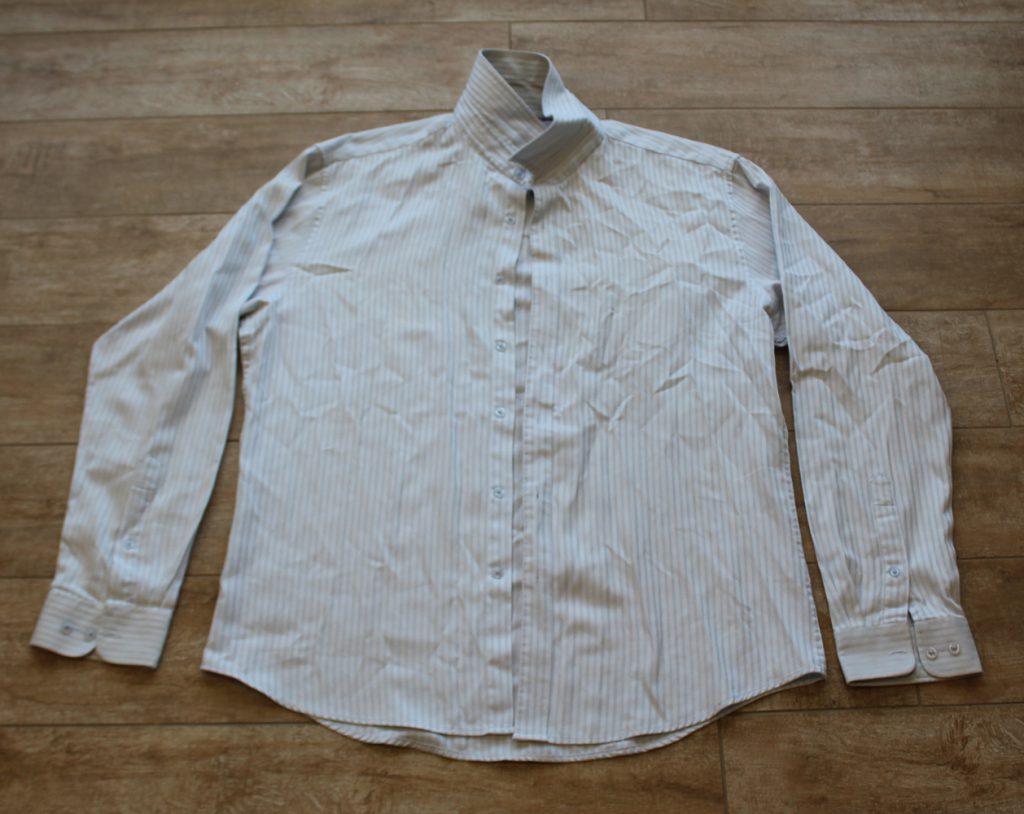
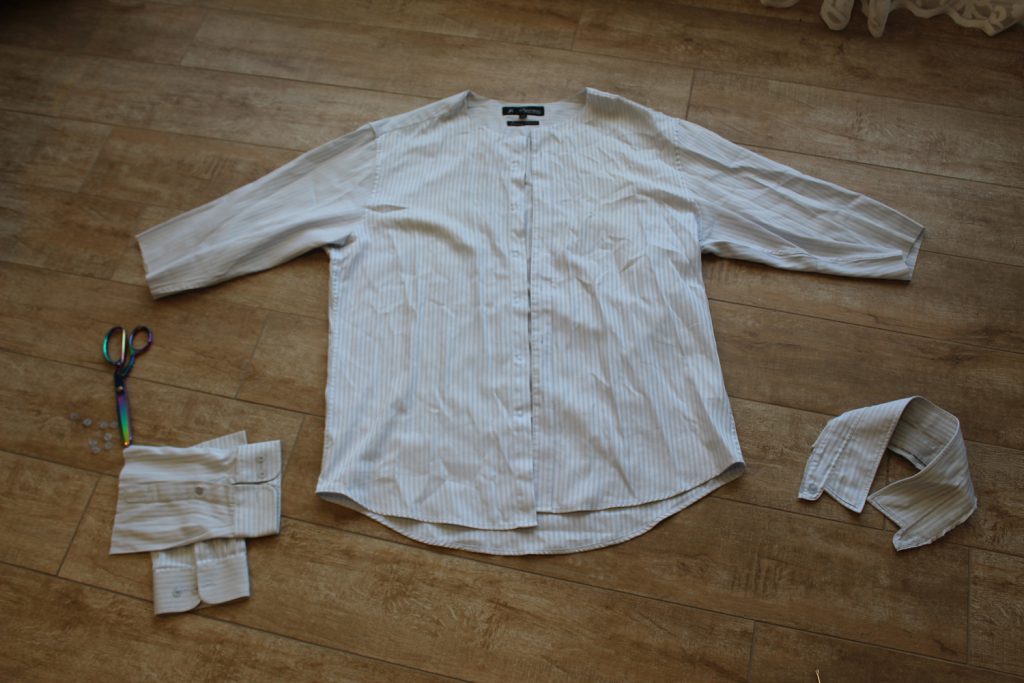
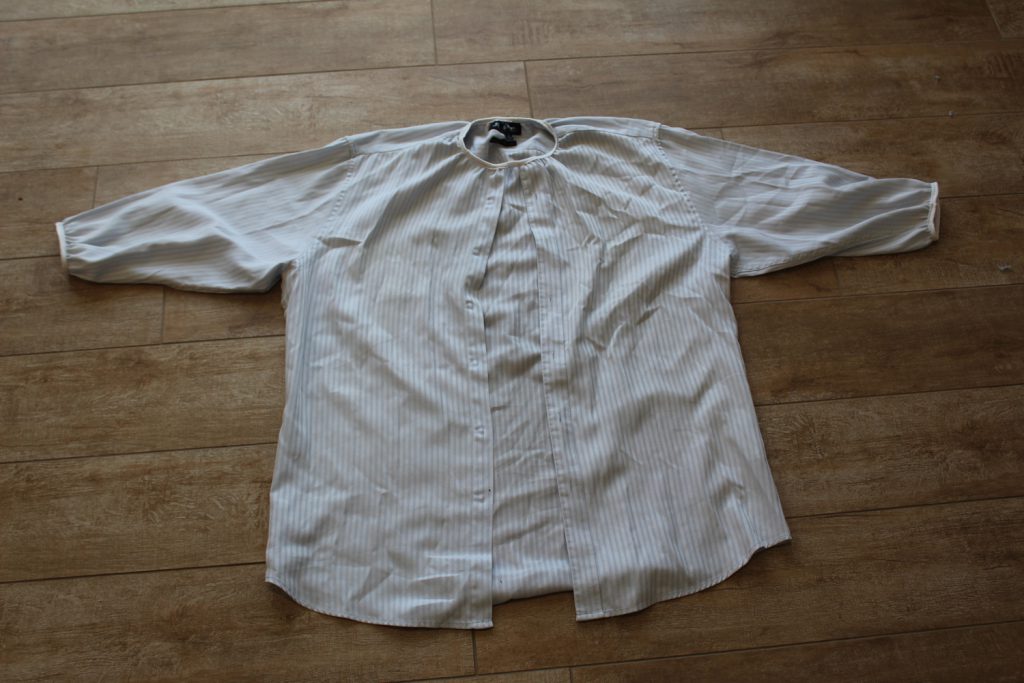
After Guy cleaned out his cupboard, I was left with a bunch of his work shirts that didn’t fit anymore. Work is in need of paint smocks for the children, so it made sense to grab them to use as paint smocks.

In the past I just rolled the sleeves up, put them on the children backwards and buttoned up the top button. But I thought they might be a little more child friendly with a few alterations.

  • Pin It
  • Facebook
  • Twitter
I started with an average men’s shirt. These were all size XL

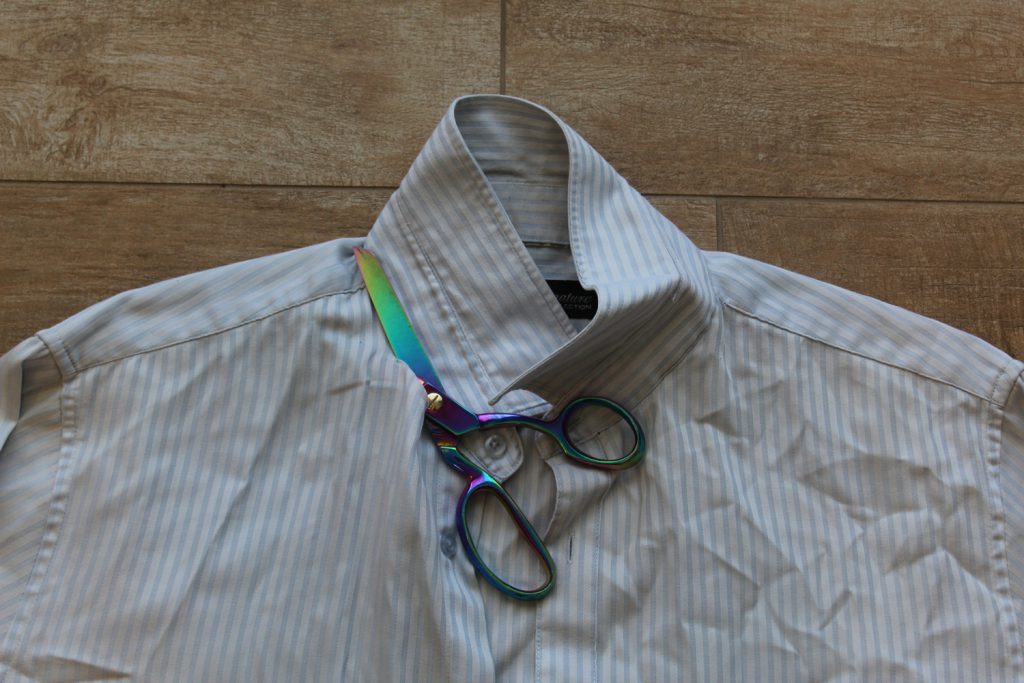
I cut off the collar

  • Pin It
  • Facebook
  • Twitter
cut off the collar

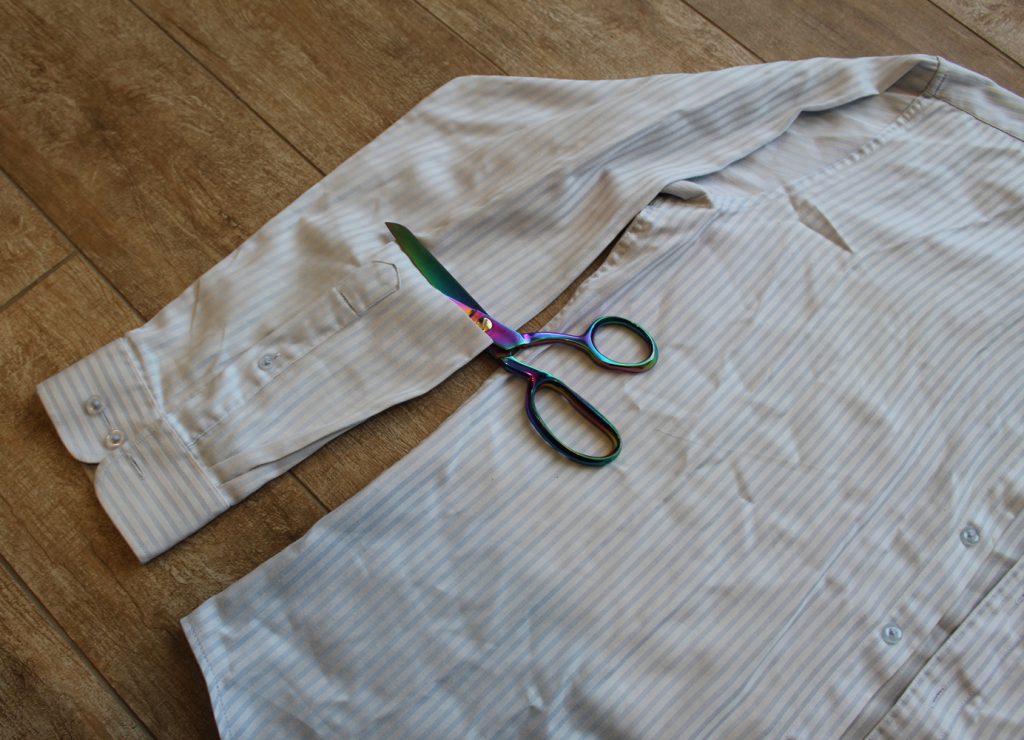
I cut off the cuffs above the button detail.

  • Pin It
  • Facebook
  • Twitter
Cut off the sleeves above the button detail

I removed all the buttons and put them aside. They might come in useful another day.

  • Pin It
  • Facebook
  • Twitter
The shirt looks a bit like this. The sleeves are off and so is the collar. I removed the buttons because I might be able to use them in another project someday.

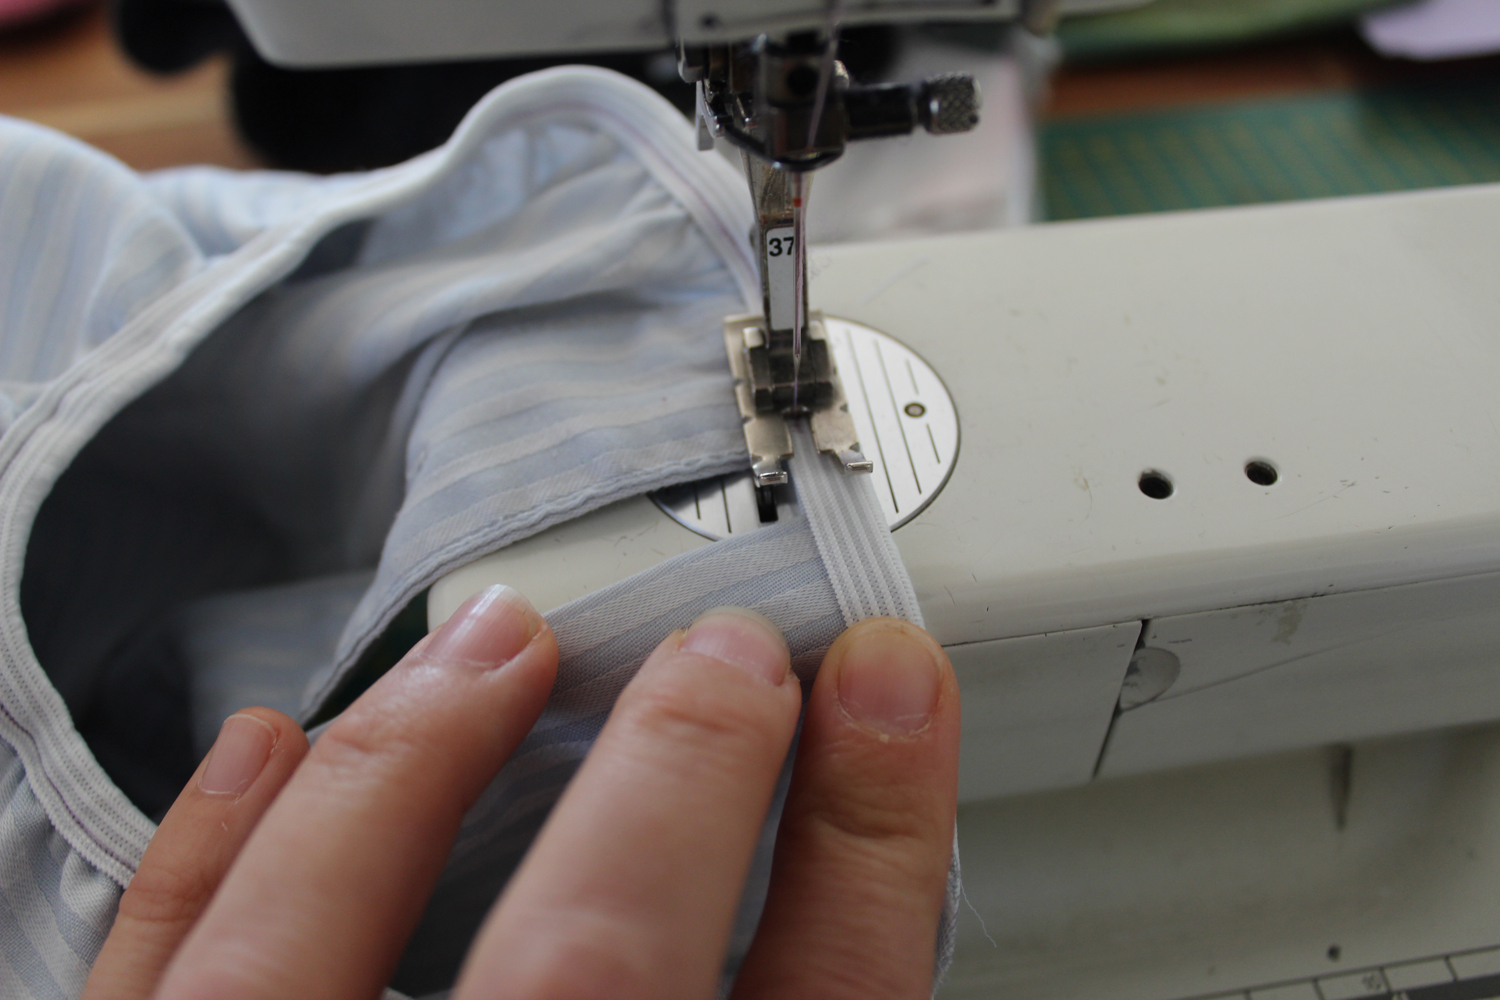
I bound the sleeves and collar with fold over elastic, pulling it slightly as I went.

  • Pin It
  • Facebook
  • Twitter
I bound the sleeves with fold over elastic. Pulling it slightly as I went

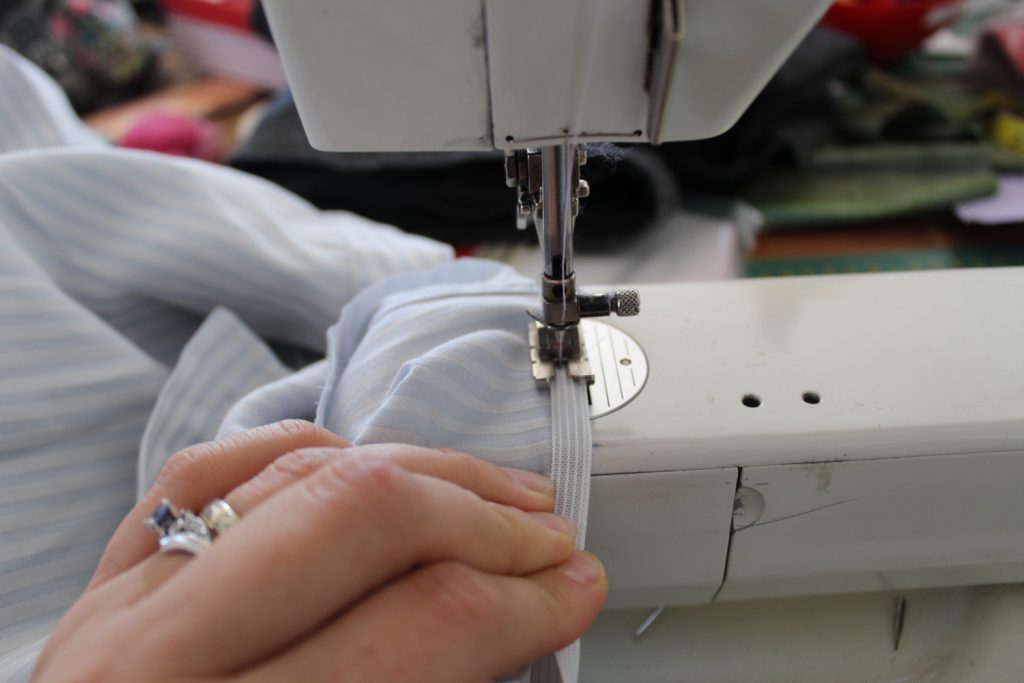
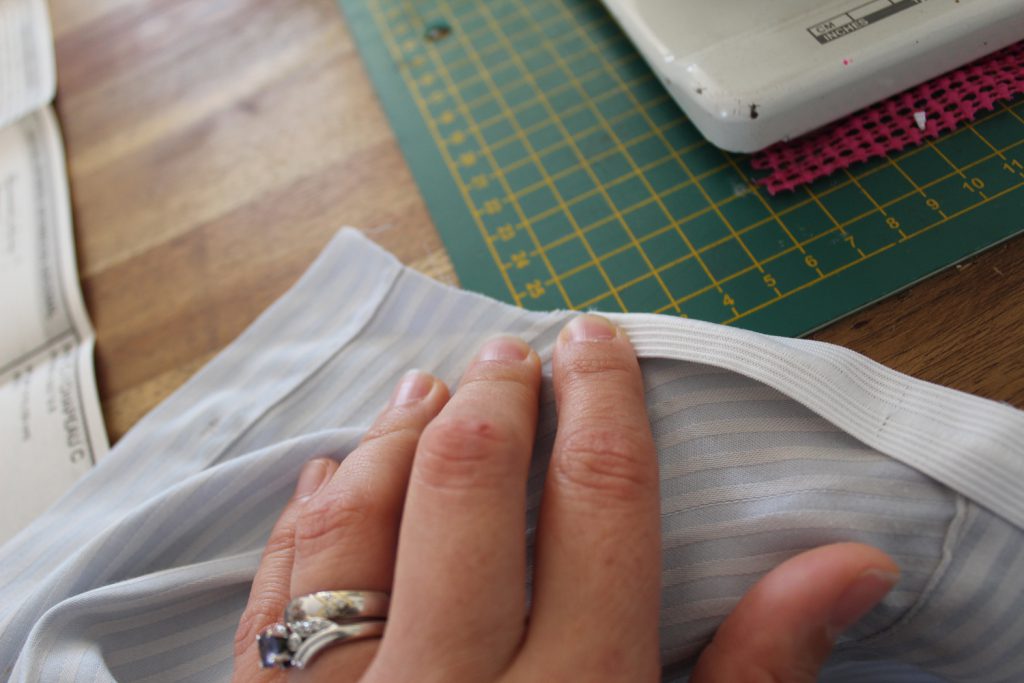
At the neck area I left a very small gap where the fronts meet and continued around with the elastic.

  • Pin It
  • Facebook
  • Twitter
For the collar, I started in a few inches from the edge
  • Pin It
  • Facebook
  • Twitter
I used the elastic to join the two edges together. I left a gap between the edges. When sewing the elastic in the gap, make sure you are still pulling it, this will make sure the stitching doesn’t break when it is stretched in use.

And wala! A paint smock from a shirt!

  • Pin It
  • Facebook
  • Twitter
The back of the shirt becomes the front of the paint smock
  • Pin It
  • Facebook
  • Twitter
The front of the shirt becomes the back of the paint smock

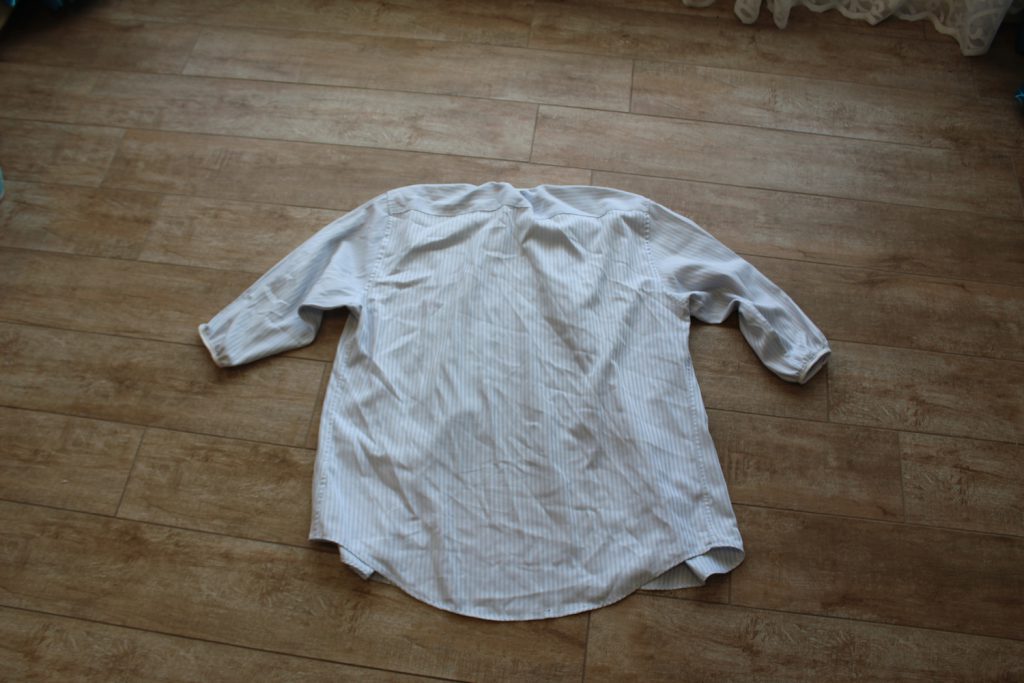
Hopefully they do the job!

Have a creative week!
<3 Cate